Sunday, November 25, 2012

Banners

Recently I made a banner for a Blood Angels sergeant.  I was able to take the logo of my favorite 40K podcast Life After the Cover Save and turn it into a banner for a squad of space marines.  Here's how you can make banners of your own. 


What you'll need:
  1. Digital image, the picture you want on the flag.
  2. Microsoft Word or any word processing software that will allow you to place pictures inside the page.
  3. Paper, you can use regular printing paper, but I recommend you buy a few sheets of the good stuff so the banners colors remain vivid. 
  4. Elmer's glue, the Brits call it PVA glue. 
  5. A plastic rod, or stick to turn into a banner pole.  You can use toothpicks, metal rod, polystyrene etc.
  6. X-acto knife
  7. Pencil
  8. Old paint brush
  9. Ruler
  10. Matt Varnish
  11. A Surface to cut on. 
To Begin with you need to have the pictures you want to use stored on your PC.  Create a folder where these images are easy to get to.  You can choose to edit the size of your picture now, or later when you are importing the pictures onto your document.  If you wish to do it now, click on your picture and edit it until the height of the picture is the right dimension consistent with the size of your banner pole.  I recommend 1" in height, the length will readjust automatically.  Save the picture, and make sure you are including the height of the picture in the picture title.  This will make it easier to find in your files. 

Open up a new page on Microsoft Word, click on the Insert Tab, then the Shapes Tab.  Select a rectangle shape, and make a rectangle on your page about 6"x 8".  The color you chose will become the background of your flag, or it's border depending on what your picture looks like.  An example would be if the background of your picture is black, and you create a black rectangle, the picture background and black rectangle will blend together and give you a smooth transition.  If the picture background is different, then your rectangle color you will be able to make a trim around your picture, giving the impression of a border around your picture. 


Import your picture onto the Microsoft Word Doc. Click on your picture and choose the Wrap Text option, then the In Front of Text option. This will bring your photo out to the front of the rectangle  you have created.  Click on your picture and use the Size and Position option, here's the your second chance to play around with the dimensions, remembering that your banner needs to fit your banner pole. You can now import the same picture again, or choose a new one. Keep in mind that the pictures you choose should be close in size, so both sides of your banner will be in proportion.  Aline the pictures side by side, and space them out so that you will be able to create a span of paper to wrap around the banner pole, between 1/4"-3/4" depending on the girth of  your banner pole.  Remember to place the pictures close to the center so there's plenty of room for you to cut material away during the next part of the project.  Save the page, and Print it. 


 Take the page and apply matt varnish to it.  I use Krylon matt varnish.  Wait for the varnish to dry.  Take the page and tape it down to your cutting surface.  Use your ruler and pencil to draw the lines of your banner around your pictures.  I created a 1/4" order around everything.  Draw the spacers between the pictures which will be the banner border and material which will attach your banner to its pole.  You can also choose to make pennants attached to the back of your flag by extending lines outward and bring them back to the border of your flag, forming triangles.  Once all your lines have been established, cut the banner out using an X-acto knife. 

Using a old paint brush, apply watered down glue to the inside of the flag. apply glue to both sides.  Take your banner and wrap it around your banner pole.  This is a messy process, bear with it.  Join both sides together and hold them there waiting for the glue to start bonding.  Make sure to press down around the flag material that's attaching directly to the pole, it should be a snug fit.  You need to begin making folds in your flag now as the glue is setting.  Just use your fingers to shape the folds out.  Once everything drys you will see some extra white material here and there.  You can choose to paint over this, or cut it out with your exacto knife.  Take a Sharpie marker, or a good brush and paint the edges of your banner to hide all the white paper underneath. Use the tip of the your brush, not the edge to paint in the white overlap. 


Sunday, November 18, 2012

40K Battle

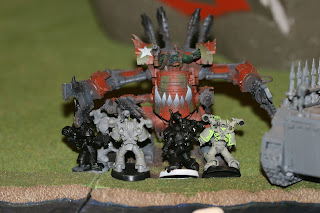
I played a game of 40K vs my buddy Alex.  I ran my orks, he ran his Chaos Space Marines army.  Long story short, I won.  In Alex's defense, it was his first time playing 6th Ed 40K.  He ran a balanced Nurgle host, with Slaanesh demons as allies.  Alex's down fall was that he rushed me, and didn't take into account how important it is to be the defender during a charge.  The pictures posted below are some of the highlights of that batte. 


Blood Angels Update

Last night I finished my pro bono commission for Blake (Big Nasty B) from the Life After the Cover Save podcast.  Blake plays Warhammer 40K and uses a Blood Angels Space Marines army.  A while ago Blake came up with the idea of having his listeners paint up his miniatures.  A few people have already volenteered for the task.  I thought this would be a great way to say thanks for all the laughter he and the LAtCS crew have brought into my life in the past year. 


The following are a few shots of my painting progress on Blakes models.  All that's left is to paint the jump pack engines, add the LAtCS flag, varnish, and oil wash.  This project should have been over with weeks ago, I've just been precrastinating.  I finally found the time, and I'm going to complete Blake's Blood Angels tonight. 


Saturday, October 13, 2012

Blood Angels Space Marines

I was given a combat squad of Blood Angels assault Marines from Blake (BnB, American Steel) from Life After the Cover Save to paint.  I was glad to receive the marines, and look forward to completing them.  I had to add some bits to complete the miniatures.  I also felt the Sergeant needed a more imposing heroic pose, so I included a banner pole in his left hand.  I will be painting up a LAtCS banner and attaching it to the pole.  I also elevated him above his men by using some cork tile to give the Sergeant a bit more height.  I airbrushed the primary red colors, and will be using my brushes to finish off the detail work.  I plan on using oil paints to shade the models after they have added the decals and a layer of clear coat. 


Thursday, October 11, 2012

Taken 2


I watched Taken 2 yesterday for lunch and I have to say it was a letdown.    The lead character Bryan Mills is played by Liam Neeson. Bryan continues to be a Hostage Recovery and Personal Protection bad ass.   The action takes in Istanbul, Turkey, but the begining of the movie takes place in the U.S.  The introduction was very stale and sappy.  The script was to invested in establishing family ties.  I know Bryan loves his wife and daughter, it was clear at the end of the first movie Taken.  I'm not sure why we need to revisit his family and friends for 25 minutes at the beginning of the movie.  The viewers don't learn anything new about Bryans abilties or back story.  We do catch up with him in Istanbul, but we never get to see his skill develope as he keeps a client safe from harm.  All the views gets to see is Bryan being given a fat bonus, and then his ex-wife and daughter show up for no reason.  This is where the bad guys get involoved and the story begins to spiral down to its demise.  

  
 I am not sure why every movie shot in a Muslim country has to begin with a Muezzin doing the Adhan, the Muslim call to prayer.  It’s to clique, and I wish Hollywood would stop doing it.  Just tell me their in a Muslim country, I get it.  The movie's bad guys are okay at what they do.  They are typical hairy back Eastern Euros.  I don't blame them for being who they need to be, every movie needs a stereo type to beat on.  All the fight seems one dimensional, Bryan is going to smash all comers.  There's one fight scene that was really good, towards the end.  Bryan fights a little dude Suko played by Alain Figlarz.  The 2 minute fight was great because both characters are using similar fighting abilities, one trying to out maneuver the other.  Of course Bryan defeats Suko, but it was a real hand-to-hand fight to the death.  Bryan pays Suko honors by closing his eyes at the end of the fight, which I thought was classy. 

I'm not sure where Hollywood was trying to go with Taken 2.  I believe the script could have been written to include a darker look into the world of kidnapping and human trafficking.  Instead the movie has over the top scenes where grenades are being thrown out into public parking lots, and The U.S. Marines shoot 50 Caliber Machinegun rounds into a cab and do absolutely zero damage to it.  I couldn't stomach Taken 2, and walked out before the closing credits.  I do not recommend Taken 2 on the big screen.  If you like watch it on Blue ray or Netflix some day in the distant future. 

Sunday, October 7, 2012

West Coast Podcast Alliance weekend

Last weekend I attended the West Coast Podcast Alliance Golden Ticket Event in Palmdale, CA.  I was able to do everything I wanted to do.  I met the podcast hosts from Life After the Cover Save, The Independent Characters, and Imperial Vox Cast.  I thanked them for all the time and effort they put into their shows and promoting our hobby here in California. 

I met several LAtCS celebrities while I was there.  Lets see there was Matt "Long Hair" LAtCS Survivor Series Champion,  Dan "The Magnet Man" with a wonderfully magnetised Tyranid Trygon, and  "Colonel Dracus" of Forge World fame.  It was cool to meet the guys.  They were all friendly and easy going people.  We discussed hobby tips and game strategy while we were there.  I think everyone had a good time. Especially after the pizzas got there, Thanks Ed for ordering those pies. 

I was able to play a four-man game with Josh from LAtCS. We ran my Orks and Josh's Eldar/Dark Eldar vs Matt "Long Hair" and Matt "SavageJester" and their Space Wolfs and Blood Angles respectively. The mass infantry of the Orks, mixed with the rapid deployment options of the Eldar are tough to defend against. Our opponents were good sports and fought to the bitter end. Ultimately it was our numbers that kept our team one step ahead of the Marines. We won the game by a hand full of kill points. 


Here are a few pictures of the tables that were being used at the event. 


Life After the Cover Save recorded their 56 episode while the event was underway.  Here are some pictures of the hosts interviewing the crews of Imperial Vox Cast, and The Independent Characters.


I had a great time at the Thunderdome, and hope the WCPA makes the Golden Ticket Event an annual affair. 

I was at the Thunderdome well after the rest of the hosts and fans had said their good byes.  Late into the night you could still hear laughter and the sound of rolling dice coming form the Thunderdome. 


Monday, September 24, 2012

Relic

I wanted to make a relic for my 40K games.  A relic is used in the mission: The Relic.  I used the Joseph the Wonderer by Scibor Monstrous Miniatures, and Groundwerks Base Inserts - 40mm Graveyard (2) from Dark Age, sold on the Cool Mini or Not website. I used cork tile to give the relic some height, and gave the top surface some character by cutting lines into polystyrene to create a stone floor. 


Shapeways

I ordered some custom 3D printer models from Shapeways a while back.  I have to be blunt about my Shapeways adventure.  I placed my order with them and was patient to wait the allotted time of three weeks for my package to arrive.  The three weeks stretched on to a month and a half, at which point I decided to contact Shapeways customer service and inquire about my purchase.  Shapeways apologized for not filling my order on time, and asked me to wait a little longer for the models to be made.  I agreed and waited another two weeks, but unfortunately Shapeways was not able to fill the order.  I contacted them again and asked for my money back.  Shapeways was quick to refund my money via PayPal, and sent me the models I had ordered for free as a way to apologize for being so late in making my models.  I have to thank the Shapeways Customer Service department for turning a bad situation into a positive experience.


I'm writing the second part of this review to answer some of Adrenal Booster's questions about the quality of Shapeways miniatures. 
 
 
To begin with I have to say that Shapeways is not a miniature making company.  They don't work in metal or resin.  They do work in plastic, several different types of plastic.  When you order from Shapeways you can choose what kind of plastic you want their 3D printers to use during the creation of your models.  I used the cheapest plastic available, so the miniatures I received did not retain a crisp edge.  The matterial I ordered has the initials MAT:WSD, this matterial looks and feels like spun plastic.  MAT:WSD will not stick if you use crazy glue, you will need to use plastic glue to make the parts stick together.  I also ordered some clear plastic bits made from MAT:FUD, these bits feel solid and have more detail than the MAT:WSD. 


The bigest item I ordered were cannons made from MAT:WSD, which I use as Kannons for my ork army.  The MAT:WSD wasn't the best matterial to reproduce this kind of complex model.  Some of the model parts did not print out, and the detail of the cannons were dull, with a melted look to them.  I had to use some polystyrene rods to fix the axle, and I used plastic glue to put them together.  I was able to put the cannons together and paint them with my airbrush. 


Shapeways took a month and a  half to deliver my models.  I called them to complain about how much time they were taking to finish m order.  The Shapeways customer service ladies calmed me down, and hooked me up by refunding my money and sending me my models for free.  I thought that was cool.  I personally will not be buying miniatures from Shapeways again, but I don't discourage other gamers from using their 3D printers to make some pieces for their armies. 

West Coast Podcast Alliance

Every month I download several 40K centric podcasts.  Three of those podcasts Independent Characters, Life After the Cover Save, and Imperial Vox Cast teamed up last year and created the West Coast Podcast Alliance (WCPA).  These three podcasts cross promote the 40K hobby here in Southern California.  They are 40K community leaders in their home towns where they set up tournaments, league nights and local gaming events. This coming weekend the WCPA will be having their first Golden Ticket Event (GTE).  An exclusive invitational taking place in Palmdale, CA at the LAtCS Thunderdome.  Winners were chosen at random and received their GTE invite a week ago.  I'm happy to be one of the recipients of a Golden Ticket.  I'm excited and looking forward to meeting the podcast crews, and thanking them for having brought me closer to my hobby. 

I wanted to make a T-Shirt to commemorate the event, so I went to Uberprints.com and made a custom shirt.  This is an unofficial WCPA shirt, and the only one ever made.  I plan on getting it signed by the podcast crews.  Later on I'll frame the shirt, and hang it up in my garage as a momento of the event.   


I came back from the West Coast Podcast Alliance Golden Ticket Event with my shirt signed.  Mission accomplished. 


Friday, August 31, 2012

I received a bucket full of my old miniatures in the mail, you have to love parents.  I started playing 40K during the Rogue Trader days.  Back then it didn't matter what your marines looked like, because they all shared the same stats.  There weren't any rules differentiating the chapters.  I had always wanted to run a crusader army with different units identified by their chapter colors.  So I did that, and the following are my attempts to seeing that vision come true.  The models bellow are 1st generation plastic Mark 6 Corvus Armor, with Mark 7 Aquila Armor arms and weapons.  The plasma guns are 1st generation ork plastic plasma guns.  Yes, that's how old they are, orks had plasma.  Here's the kicker, all the single miniatures are made of lead. 

 Space Wolves Grey Hunters

Blood Angels Assault Squad

Blood Angles Assault Squad Battle Banner

Blood Angles Tactical Squad Battle Banner 

 Ultramarines 1st company

Ultramarines Veteran Sergeant

Ultramarines Captain

Ultramarine Rapier

Saturday, August 4, 2012

Total Recall

Went to watch the new Total Recall.  I enjoyed it.  The story plot is still there, but missing the grandness of the original movie.  I never got around to reading the book, it is on my reading list.  If you are a fan of scifi and like to see see action and badass leading ladies, go check it out. 

Friday, August 3, 2012

Airbrush booth

A while back I needed a airbrush booth where I could airbrush my miniatures without the concern of ending up with a multi-colored guest room.  I looked on line for a sensibly priced booth, but I couldn't find one under $100.  I decided to make my own.  I used a large plastic storage container, a bathroom fan, some nuts, washer and bolts, and power cord. The materials cost me $60 at my local Home Depot.  Here's the result.